# Unit Testing React Apps: Vitest + React Testing Library
- Author: Aljaz Oblonsek
- Published: 2023-07-16
- Canonical URL: https://portfolio.oblonsek.si/posts/unit-testing-react-apps-vitest-react-testing-library
Discover the combined power of Vitest and React Testing Library as I walk you through essential techniques for testing React apps in this blog post.
---
This blog post will guide you through the basics of unit testing in React apps and provide a tutorial on how to set it up using Vite and React Testing Library.
## What is Automated Testing & What is Unit Testing?
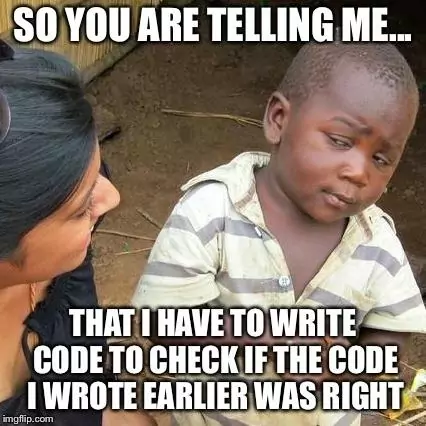
For those who prefer a TLDR: Automated testing is essentially writing code to verify that your code works correctly.
Source: programmerhumor.io
Now, for a more formal definition: **Automated testing** is the use of software tools to execute pre-scripted tests on a software application automatically, ensuring its functionality, identifying defects, and improving overall quality.
So, what is unit testing? **Unit testing** is a type of automated testing where individual units or components are tested in isolation to verify their correctness and functionality. This means mocking any external dependencies, such as API calls.
In my React apps, I typically use unit tests for reusable functions and components. For example, I make sure that my `onClick` callback is called when clicking on a button. The extent of testing the functionality of your app is up to you. Sometimes, it makes sense to test every little thing; for instance, if I pass the color red to my button, I make sure that the correct style is applied. However, other times it may not be necessary to test certain aspects. Ultimately, it's your decision to determine if the time invested in writing and maintaining tests pays off.
## Pros and Cons
### Pros
- Early Bug Detection: Unit tests catch bugs at the individual unit level, allowing us to identify and fix issues early in the development process.
- Increased Code Reliability: Writing unit tests ensures that each unit functions as expected, providing a safety net when making changes or refactoring code, resulting in more reliable and robust software.
- Better Code Documentation: Unit tests also serve as documentation for the intended behavior of each unit, making it easier for developers to understand and work with the codebase.
### Cons
- Time-Consuming: Writing and maintaining unit tests can be time-consuming, potentially impacting the overall development timeline.
- Resource Intensive: Creating comprehensive unit tests may require a significant allocation of development resources.
- False Sense of Security: Relying solely on unit tests may lead to overlooking higher-level integration or end-to-end issues.
Alright, that's it for the definitions and some pros & cons. Now, let's get into the fun part - installing test tools & writing our tests!
## Prerequisites
- Node.js
- npm (Node Package Manager)
- React project setup with Vite - you can follow my tutorial to set it up
- This tutorial will also assume you use TypeScript in your project
## Installing and Setting up Vitest + React Testing Library
1. Install the required dev dependencies:
```bash
npm install --save-dev vitest @testing-library/react @testing-library/jest-dom jsdom @vitest/coverage-v8
```
2. Update `vite.config.ts` with the following code (you might need to change it to fit your setup):
```ts
/* eslint-disable import/no-extraneous-dependencies */
///
///
import { defineConfig } from 'vite';
import react from '@vitejs/plugin-react';
// https://vitejs.dev/config/
export default defineConfig({
plugins: [react()],
test: {
globals: true,
environment: 'jsdom',
setupFiles: ['./src/setupTests.ts'],
coverage: {
provider: 'v8',
reporter: ['text', 'json', 'html'],
reportsDirectory: './coverage/unit',
},
},
});
```
3. Create a new file named `setupTests.ts` inside the `src` folder and add the following code to it:
```ts
/* eslint-disable import/no-extraneous-dependencies */
import matchers from '@testing-library/jest-dom/matchers';
import { expect } from 'vitest';
expect.extend(matchers);
```
4. Add the following commands to the `scripts` section in your `package.json` file:
```json
"test-unit": "vitest",
"test-unit:cov": "vitest run --coverage"
```
You're all set! Now you can run unit tests with npm `run test-unit` or `npm run test-unit:cov` to generate a coverage report. The coverage report will be available in the `coverage/unit` directory.
## Writing Your First Unit Test for a Function
1. Create a new file named `greetWithName.ts` in the `src` directory and add the following code to it:
```ts
export const greetWithName = (name?: string): string => {
if (!name) {
return "I don't know your name :(";
}
return `Hello ${name}!`;
};
```
This is a basic function that greets a person by their name if provided; otherwise, it returns a default message.
2. Create a new file named `greetWithName.test.ts` in the same directory and add the following code to it:
```ts
import { describe, expect, it } from 'vitest';
import { greetWithName } from './greetWithName';
describe('greetWithName', () => {
it("should return 'I don't know your name :(' if name parameter is falsy", () => {
const greetMessage = greetWithName();
expect(greetMessage, "I don't know your name :(");
});
it('should return the "Hello name" provided if name parameter is provided', () => {
const greetMessage = greetWithName('John');
expect(greetMessage, 'Hello John');
});
});
```
These test cases verify the behavior of the `greetWithName` function.
3. Now you can run `npm run test-unit` to run your first unit test!
## Writing Your First Unit Test for React Component
1. Create a new file named `Button.tsx` in the `src` directory and add the following code to it:
```ts
import { ReactNode } from 'react';
type ButtonProps = {
onClick?: () => void;
children: ReactNode;
};
const Button = ({ onClick, children }: ButtonProps) => {
return (
);
};
export default Button;
```
The `Button` component is a basic React button component that takes two props: `onClick`, which is an optional callback function to be executed when the button is clicked, and `children`, which represents the content of the button.
2. Create a new file named `Button.test.tsx` in the same directory and add the following code to it:
```ts
import { describe, expect, it, vi } from 'vitest';
import { cleanup, fireEvent, render } from '@testing-library/react';
import Button from './Button';
describe('', () => {
beforeEach(() => {
cleanup();
});
it('should render', () => {
const { queryByTestId } = render();
expect(queryByTestId('button')).toBeInTheDocument();
});
it('should correctly render its content', () => {
const { getByTestId } = render();
const button = getByTestId('button');
expect(button.innerHTML).toBe('Click me!');
});
it('should call onClick callback if provided', () => {
const onClickMock = vi.fn();
const { getByTestId } = render();
const button = getByTestId('button');
fireEvent.click(button);
expect(onClickMock).toHaveBeenCalledOnce();
});
});
```
In the `Button.test.tsx` file, we are writing unit tests for the `Button` component using the `vitest` testing library along with the `@testing-library/react` utilities.
- The first test, `'should render'`, ensures that the button is rendered properly by querying the button element with the test ID `'button'` and checking if it's in the document.
- The second test, `'should correctly render its content'`, checks if the content of the button matches the provided text `'Click me!'`. It retrieves the button element using the test ID and then checks its innerHTML.
- The third test, `'should call onClick callback if provided'`, verifies that the `onClickMock` function passed as a prop to the `Button` component is called once when the button is clicked. It uses `fireEvent.click()` to simulate a click event on the button and then checks if the `onClickMock` function was called.
These tests help ensure that the `Button` component behaves as expected, rendering correctly and triggering the callback function when clicked.
3. You can run `npm run test-unit` to run your first component unit test!
Congratulations, you've reached the end of the blog post! I hope you have learned something new about unit testing in React apps. In the next post, we will dive deeper into testing React components with real-world examples and more advanced techniques.
**References:**
- Vitest Documentation
- React Testing Library Documentation
Feel free to explore these references to learn more about unit testing and testing libraries for React applications. Happy testing!
 Source: programmerhumor.io
Now, for a more formal definition: **Automated testing** is the use of software tools to execute pre-scripted tests on a software application automatically, ensuring its functionality, identifying defects, and improving overall quality.
So, what is unit testing? **Unit testing** is a type of automated testing where individual units or components are tested in isolation to verify their correctness and functionality. This means mocking any external dependencies, such as API calls.
In my React apps, I typically use unit tests for reusable functions and components. For example, I make sure that my `onClick` callback is called when clicking on a button. The extent of testing the functionality of your app is up to you. Sometimes, it makes sense to test every little thing; for instance, if I pass the color red to my button, I make sure that the correct style is applied. However, other times it may not be necessary to test certain aspects. Ultimately, it's your decision to determine if the time invested in writing and maintaining tests pays off.
## Pros and Cons
### Pros
- Early Bug Detection: Unit tests catch bugs at the individual unit level, allowing us to identify and fix issues early in the development process.
- Increased Code Reliability: Writing unit tests ensures that each unit functions as expected, providing a safety net when making changes or refactoring code, resulting in more reliable and robust software.
- Better Code Documentation: Unit tests also serve as documentation for the intended behavior of each unit, making it easier for developers to understand and work with the codebase.
### Cons
- Time-Consuming: Writing and maintaining unit tests can be time-consuming, potentially impacting the overall development timeline.
- Resource Intensive: Creating comprehensive unit tests may require a significant allocation of development resources.
- False Sense of Security: Relying solely on unit tests may lead to overlooking higher-level integration or end-to-end issues.
Alright, that's it for the definitions and some pros & cons. Now, let's get into the fun part - installing test tools & writing our tests!
## Prerequisites
- Node.js
- npm (Node Package Manager)
- React project setup with Vite - you can follow my tutorial to set it up
- This tutorial will also assume you use TypeScript in your project
## Installing and Setting up Vitest + React Testing Library
1. Install the required dev dependencies:
```bash
npm install --save-dev vitest @testing-library/react @testing-library/jest-dom jsdom @vitest/coverage-v8
```
2. Update `vite.config.ts` with the following code (you might need to change it to fit your setup):
```ts
/* eslint-disable import/no-extraneous-dependencies */
///
Source: programmerhumor.io
Now, for a more formal definition: **Automated testing** is the use of software tools to execute pre-scripted tests on a software application automatically, ensuring its functionality, identifying defects, and improving overall quality.
So, what is unit testing? **Unit testing** is a type of automated testing where individual units or components are tested in isolation to verify their correctness and functionality. This means mocking any external dependencies, such as API calls.
In my React apps, I typically use unit tests for reusable functions and components. For example, I make sure that my `onClick` callback is called when clicking on a button. The extent of testing the functionality of your app is up to you. Sometimes, it makes sense to test every little thing; for instance, if I pass the color red to my button, I make sure that the correct style is applied. However, other times it may not be necessary to test certain aspects. Ultimately, it's your decision to determine if the time invested in writing and maintaining tests pays off.
## Pros and Cons
### Pros
- Early Bug Detection: Unit tests catch bugs at the individual unit level, allowing us to identify and fix issues early in the development process.
- Increased Code Reliability: Writing unit tests ensures that each unit functions as expected, providing a safety net when making changes or refactoring code, resulting in more reliable and robust software.
- Better Code Documentation: Unit tests also serve as documentation for the intended behavior of each unit, making it easier for developers to understand and work with the codebase.
### Cons
- Time-Consuming: Writing and maintaining unit tests can be time-consuming, potentially impacting the overall development timeline.
- Resource Intensive: Creating comprehensive unit tests may require a significant allocation of development resources.
- False Sense of Security: Relying solely on unit tests may lead to overlooking higher-level integration or end-to-end issues.
Alright, that's it for the definitions and some pros & cons. Now, let's get into the fun part - installing test tools & writing our tests!
## Prerequisites
- Node.js
- npm (Node Package Manager)
- React project setup with Vite - you can follow my tutorial to set it up
- This tutorial will also assume you use TypeScript in your project
## Installing and Setting up Vitest + React Testing Library
1. Install the required dev dependencies:
```bash
npm install --save-dev vitest @testing-library/react @testing-library/jest-dom jsdom @vitest/coverage-v8
```
2. Update `vite.config.ts` with the following code (you might need to change it to fit your setup):
```ts
/* eslint-disable import/no-extraneous-dependencies */
///